Posted by ChroniclesCapersCanards
on
9:12 AM
For this pie unit we used multiple ways of creating and baking pies. Throughout this process we ran into some problems but ultimately the pies came out good. To create the pie dough we mixed all of the ingredients together in a mixer until it reached its doughy state. Then we took the dough out of the mixer and put it on top of a sheet of plastic wrap and then covered the dough with another sheet of plastic wrap. We then started to roll out the dough with a rolling pin. This is where I ran into some problems because throughout the rolling process I would run into problems such as the shape of the dough not being correct, I would find myself rolling a square instead of a perfect circle. The problem I would run into is the dough cracking or becoming too thin. Although I ran into problems, my dough did come out well. I then proceeded to put the dough into a pie dish which was a problem on its own. I would put it in and have issues portioning it out. I would have spots that were either too thick or too thin. Once the dough was rolled out I portioned out the pumpkin mix. When we poured in the pumpkin mix it was very liquidly and not that pleasant to look at. But when the pie was done it looked good and tasted good.
Nicholas Carozza

Posted by ChroniclesCapersCanards
on
9:14 AM
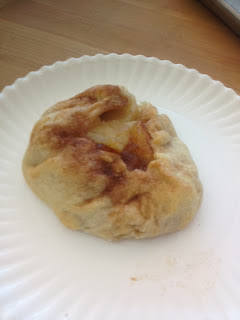
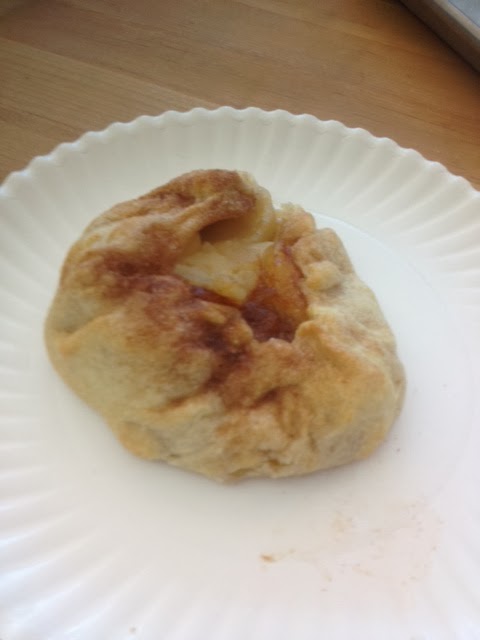
In the pie unit we learned how to make different forms of pie. We made a free form pie with apple filling called a galette, and then we made a pumpkin pie in a tin. We used the same dough for both in order to make the pie crust. For the crust we used the biscuit method of cutting the butter into the flour and adding the wet ingredients after. A new ingredient we used in this unit was Crisco, an animal fat. A challenge I was faced in this unit was creating my galette. This was because my dough was continuously ripping when I was wrapping it around the apple filling. Even though it did not look as appetizing as the pumpkin pie, the apple galette was much tastier than the pumpkin pie. I enjoyed it enough that I used the recipe for the filling, and interpreted it a little in order to make an apple crisp.
-Meg M

Posted by ChroniclesCapersCanards
on
10:28 PM
During the pie unit we made apple pie, pumpkin pie, and pinwheel cookies. For the apple pie we learned how to roll the dough in between Saran wrap so that the delicate thin dough wouldn't stick to the rolling pin. We also learned to roll from the center, out so that all the dough is the same thickness. When the dough was all rolled out we put in the apples we sautéed with brown sugar and folded the dough so that it was mostly covering the apples inside. For the pumpkin pie we used a pie tin so that the pie would look more aesthetically pleasing. Before we poured the pumpkin filing into the pie tin we fluted the edges so it would look pretty. And for the pin wheel cookies we rolled out the pie dough, sprinkled cinnamon on it, and then rolled them up.
Lauren R
Posted by ChroniclesCapersCanards
on
9:53 PM
The most current unit we completed was the pie unit where we created 2 different types of pies and pop tarts. To make all of these recipes, we used the same pie crust recipe which used the biscuit method by adding the butter to the flour mixture. This crust was then stored in the fridge overnight. Our class made apple pie first and then pumpkin pie. The apple pie filling was made with sliced apples, cinnamon sugar, and lemon juice, and was then sauteed lightly in a pan. We then put the filling in the middle of the dough and folded the extra over. The pumpkin pie had a different filling then was more of a liquid when put into the oven. The filling was made with a cream base and was poured into tins with the crust placed on the insides. This pie was harder to form since it required fluting the edges. Unfortunately, I didn't trim the access dough, so in the oven the ended came off of the in. The last pastry we made in this unit was the pop tart. This was much simpler since we just had to cut out the pir crust and fill with peanut butter and chocolate.
-Emily C

Posted by ChroniclesCapersCanards
on
7:10 PM
In the Pie unit, we made a lot of yummy stuff- from pumpkin pie to pinwheel cookies, but my favorite was the apple gallette. It was so yummy and looked really good!
We made the crust first, which was an easy one- easy to make, easy to bake, as I liked to say. We used the biscuit method to cut butter and shortening, then adding cold water into the mix after everything was cut down enough. We rolled the dough out and cut it into four parts for all of us.
The filling was apples cut up with cinnamon, sugar and nutmeg, sauteed to warm, gooey perfection and placed that into the center of the rolled out pie dough, bring the edges up to pleat it around the edges and only showing a small part of the apple filling.
We baked it and waited impatiently for them to come out, and once they did, we ate all of ours in a flash!
I wanted to wait for a bit before I ate mine, but I had gone to get something during lunch and one of my friends took it and ate it all! Now I'm going to make it again for Thanksgiving, so I'm excited for that!
Sarah H.
Posted by ChroniclesCapersCanards
on
6:14 PM
For the pie unit, we made two types of pies: an apple pie and pumpkin pie. These were two different types of pies that are made. The apple pie was a free-form pie that had apple slices in it while the pumpkin pie filling was a purée. To make the pie crust, we were introduced to a new ingredient which is Crisco - which is a vegetable shortening. It is similar to butter, but it makes the pie crust flakier than using just butter. We had to cut in the Crisco just like the butter before adding in the other ingredients. We also learned a new way to roll out dough using two sheets of saran wrap. We would place the dough inside the saran wrap and then roll the dough in between the two sheets of saran. This prevented the dough from sticking to the rolling pin and it decreased the amount of excess flour that we needed to roll out the dough. Aside from making pies, we used the pie crust to make poptarts. We used the same pie crust recipe, but we rolled out the dough into two rectangles and put the filling in between the two pieces of dough. Making poptarts allowed us to be able to use the pie crust in different ways besidesusing it just for pies.
~Maryyam A.


Posted by ChroniclesCapersCanards
on
12:10 AM
In this unit we made apple pies, pumpkin pies, turnover cookies, and pinwheel cookies.
All four variations came from the same pie crust, but the fillings were different.
The apple pie was filled with apples that were sliced and sauteed with cinnamon, sugar, and nutmeg. The filling was placed in the center of the pie crust, rolled out to be a circle, and then it was folded up until only a little apple was exposed and cinnamon sugar was sprinkled on top.
The pumpkin pie was made to look more traditional-- the filling was made with pumpkin puree and it was poured into the center of the pie crust, which was in a miniature pie tin. For decoration, the edge of the pie crust was fluted, a method that involved twisting your fingers on the pie dough in order to create a wavy pattern. These came out nicely, although my fluting could have been more even.
The turnover cookies and pinwheel cookies were alternatives to using pie crust. The turnovers were miniature pop tarts, and were made by rolling a pie crust thin, cutting into circles with a pastry cutter, filling with a garnish, (in this case chocolate chips and peanut butter) brushing the edges with egg wash, and folding them into half circles to look like dumplings. The turnovers, while tiny and time-consuming, were a very good dish in terms of presentation.
The pinwheel cookies were almost like small cinnamon buns. The crust was rolled out into a strip, sprinkled with cinnamon sugar, rolled back into a log, and cut into circles. The process was very simple, but these also made a good presentation piece as they came out golden brown with a swirl of cinnamon sugar in the middle.
Lilly F.
Posted by ChroniclesCapersCanards
on
5:22 PM
This unit was the Pie unit. In the pie unit we made an apple galette, pumpkin pie, and pinwheel cookies and pop tarts. All of these recipes used pie crust. We did different thing to the pie crust for each recipe. For the apple galette we rolled out the pie dough making sure it was an even thickness. For this recipe it didn't matter if it was a perfect circle as much because it was a free form pie and did not have to be even. For the pumpkin pie it made it easier, and was more important if the pie dough was rolled out into an even circle. We then put the pie the pie tin and fluted the edges of the pie for aesthetics. For the pop tart recipe we rolled it into more of a rectangular shape. Then folded it over in half after putting the filling in. Overall this unit went pretty smoothly for our Group.
-Clara W.
Posted by ChroniclesCapersCanards
on
4:35 PM
Laken Hughes
Pie Blog
In the pie unit we make apple pie fold overs, pumpkin pie, pop tarts and pin wheel cookies. When making the pie crust you had to cut the butter into the four. We’ve done this before in class so I thought that as a group it progressively became easier. For the apple filling, we cut up all the apples and then mixed together the cinnamon and other ingredients. The problem that we can into when making the filling was we didn’t use that large of a pan so it took longer for them to become cooked all the way through and we had to stir very carefully so they didn’t spill out. When we rolled out the pie crust dough we had to roll it between to two pieces of saran wrap to create a circle shape. When making the pumpkin pie we had to flout the crust, so after placing the dough in the tin we pinched the dough so that in the end it almost looked like a sun. For the pop tarts, the filling that I used was the caramel squares for one and chocolate chips and marshmallows in the other. In both pop tarts the ingredients melted but the puff kept its shape. For the pin wheel cookies we just rolled out our dough and then sprinkled cinnamon and sugar and then rolled the dough into a long log and cut up the log then baked them. I enjoyed this unit because I liked learning about all the different things that you can do with pie crust, it wasn’t an easy process but I had a lot of fun doing it.

Posted by ChroniclesCapersCanards
on
6:07 PM
In this unit, we made various types of pies. The first recipe we made was an apple galette. After that we made pumpkin pies, and then we made pinwheel cookies using pie crust. In all of these recipes we had to make pie crust and roll it out. We needed to learn the techniques of rolling out the dough so that it was the correct thickness and the shape was right. For the apple galette we rolled the pie crust into a circle by rolling from the center, out, and then making quarter turns after each roll. This created a nearly perfect circle. We then put our sliced apples coated in cinnamon in the center of the dough, and wrapped the dough up around it. For the pumpkin pie, we made a more traditional looking pie. We rolled out the dough into a circle the same way, and then put it into a pie tin. We fluted the edges for aesthetic appeal, and then poured the pumpkin filling in. For the pinwheel cookies, we rolled the pie crust into more of an oval shape and then cut it into strips. We coated each strip in egg and sprinkled them with cinnamon and sugar. We then rolled them up into little pinwheels and baked them. All of our recipes this unit turned out pretty well.
-Veronica E.


Posted by ChroniclesCapersCanards
on
9:49 AM
In our unit of pies, our group was very productive and worked together efficiently. We made apple and pumpkin pies, as well as mini pop tarts using the pie crust dough. To make our dough it was essential to chop the butter into small cubes before mixing in into the flour, sugar and salt mix. We than added cold water, witch prepared the dough we then had to knead and roll into a circular shape using rolling pins. At first it was hard to evenly spread the dough so that it wasn't more or less thick or thin in different places. We than had to refrigerate our dough, meaning that the next class period we had to thaw the dough until it was soft again. When cutting our apple pieces for the apple pie filling, we skinned and cored each apple and than chopped then into thin wedges. Then we caramelized then with butter, sugar, and lemon juice. After filling the pie crust we folded in each corner creating an appealing appearance. When making the mini pop tarts, my group had trouble shaping the dough into the correct shape, but with Erin's help, we all ended up with perfect rectangles. Then each of us added our own garnishes to fill them and based the inside with egg-wash so that the dough will stick together and stay closed. They turned out great.
Alex J.


Posted by ChroniclesCapersCanards
on
7:50 PM
The last unit that we finished was the pie unit. First we made galettes. The way that we did this was we added flour and sugar into a mixing bowl. We then added the cut butter into the flour and sugar mixture. When the butter was evenly cut, we added the lard. Then when that is evenly combined the water was mixed in. After the pie dough was done we put that in the refrigerator to cool. We had to peel, cut and core apples. When the apples were all cut up we put them into a mixing bowl and tossed them with lemon juice and brown sugar. Finally we put the apples into a skillet and then cooked them off until they were soft. When the apples were soft we added flour and cinnamon. Then finally when everything was made we rolled out the chilled pie dough, and distributed the apple filling onto the dough. Then the dough was folded over and the mini galettes were ready to be baked. To make our pumpkin pie we had to crimp the edges of the crust before at put the pumpkin filling in. Then we made pop tarts. We took out the pie dough that we made the day prior and then rolled it out and added our filling and then baked them.


- Jessica Longi
Posted by ChroniclesCapersCanards
on
2:37 PM
Our class just finished the cookie unit where we learned how to make classic chocolate chip cookies, healthy chocolate chip cookies, specialty cookies, and bar cookies.
After baking then tasting both the chocolate chip cookies using the original Toll House recipe and the healthier chocolate chip cookies, I learned that healthy versions of recipes can be just as good- if not better- than the original. We substituted egg whites for whole eggs and cut down on the amount of butter and chocolate chips added. I loved the taste of the healthy cookies and knowing how much better they were for you than the originals made them even better!
Another of my favorite recipes we made during this unit was the snickerdoodle specialty cookies my group chose to make. We found a recipe online and modified it by following the given directions for the dough then inserting a caramel piece into the middle of the cookie so that it would melt while in the oven. During the process of creating these cookies, we learned how to roll the balls of dough in the cinnamon sugar mixture before placing them on the cookie sheet and how to recognize that snickerdoodles are done baking once cracks can be seen on the face-up side of the cookie. Our end product was delicious!
When my group made our Peanut Butter Chocolate Chip biscotti, we ran into a time issue. Biscotti must be cooked once for about 25 minutes, taken out and cut, then cooked again for another 8 minutes or so, but because of the length of the class period and the fact that we put our biscotti in later than planned; they did not get the full time to cook. Our biscotti were only in the oven for the first 25 minute session. We decided to take the cookies out and eat them as they were because they were cooked all the way through, just not as hard as the traditional biscotti. The cookies were still yummy!
I thoroughly enjoyed this cookie unit because of all the units we have completed, I am most likely to make cookies at home. Learning these new recipes will add some variation to what I normally bake. (Marissa T)
Posted by ChroniclesCapersCanards
on
8:01 PM
Emma Cizmazia
Class: 2
Mrs. Hoagland
October 17, 2013
Blog
Yeast Bread Unit
In this unit we studied and made yeast bread. Everything we made contained the leavening agent of yeast. Throughout this unit some of the recipes we made included rolls, grilled pizza, soft pretzels, and cinnamon buns. Throughout this experience, the recipe that produced the least favorable outcome was by far our pizza. I’m choosing to dedicate my blog to this recipe because it was the one that proved most challenging and the one my group and I made the most mistakes on.
To start off, our mise en place was a disgrace. The entire period we were running in and out of the kitchen looking for missing ingredients or materials like chickens with their heads cut off. We began the recipe by using the blooming method to bloom our yeast in warm water for a total of five minutes. This was challenging because if the water was to cold, the yeast would not bloom, and if the water was too hot, then the yeast would die and our dough would not rise. Because you can’t tell if the yeast has properly bloomed, it’s basically a guessing game until you wait the proper amount of time and see that your dough has either risen, or not. It turns out that we were able to successfully bloom our yeast. Crisis one avoided. After that, we mixed our dry ingredients in a metal bowl, added the oil, and the warm yeast water.
The real challenge began after we had our dough the next day. The first problem that we encountered was we put WAY to much oil on the raw dough in preparation for putting it on the grill and this made it hard to transfer onto the waiting grill. Also, we each had giant pieces of raw dough that when picked up with our fingers and later the tongs, ripped very easily. We should not have stretched our dough so thinly. Then, because of the hectic grill scene, the dough burned in some places. Then we added our toppings of choice and into the over it went. Because we underestimated the total cooking time necessary in the over to fully cook the toppings, we took the pizza out to early. All in all my pizza looked pretty unappealing. With the basically raw, uncooked cheese and semi arm sauce, it was a sight for sore eyes. But, fortunately it tasted amazing. You wouldn’t guess that from the look of it, but if you ignore the poor presentation and look past its many imperfections long enough to take a bite, you would be pleasantly surprised.
Posted by ChroniclesCapersCanards
on
6:14 PM
Our Baking and Pastry
class recently completed our yeast unit where we learned how to make King
Arthur “No-Knead” bread, pizza dough, soft pretzels, and monkey bread.
During this unit, we learned about yeast- how it must be
given time to “bloom” in certain recipes by putting it in warm water for a few
minutes and how if it is added to water that is too hot, you risk killing the
yeast. Yeast is a living organism, so
you must be careful with it. Putting it
in water that is too hot will kill it, making it unable to help your bread
rise.
When
we made the King Arthur bread, we made two batches of the same dough then baked
one during that same class and put the other in a covered bowl and stored it in
the refrigerator. After tasting both the
rolls made from the dough with the yeast that wasn’t given much time to rise (dough/rolls
made during the same class) and the rolls made from the dough that had been given
3 days to rise, we noticed the differences between the two. I found the second batch of rolls was less
dense and had a much different flavor than the first batch. Personally, I liked the second batch better.
Also,
when my group was in the process of making the sweet dough that would later be
used for our monkey bread; we learned how to modify a recipe when a mistake is
made. In this case, we added 2
tablespoons and ¼ teaspoon of yeast when just 2 ¼ teaspoons were supposed to be
added to the dough. In other words, we
put 2.78 times as much yeast into the mixture than we were supposed to. In order to fix this problem, we multiplied each
of the other ingredients by 2.78 so that the ratios all remained the same. In the end, our dough rose and tasted exactly
like it was supposed to. It was a
success and our monkey bread was delicious!
The
process of making the pizza dough and soft pretzels taught us how to knead the
dough properly. We learned that if the
dough is really sticky, flour can be added to reduce the stickiness. We also learned how to fold the dough in order
to form the pretzel shape and how to grill the pizza dough with olive oil. (Marissa T)
Posted by ChroniclesCapersCanards
on
12:27 PM
The unit that we are currently done working on was the
cookie unit. During this unit we made a variety of different cookies. One of
the cookies we made was a five layer bar. The way we made this was by crumbling
graham crackers in a bowl and spreading them evenly into a pan. We sprinkled
coconut over top of the crumbled graham crackers. After that was evenly spread
out chocolate chips were sprinkled over top. Then we made condensed milk. The
way that we made the condensed milk was by putting evaporated milk and sugar
into a pot and heating it until the sugar was melted. When everything was
melted it was poured evenly over the chocolate chips. Finally peanuts were
added to the top and then baked. After they were cooked we used a bench
scrapper to cut the bar out of the sheet pan. Once they were cut and they
weren’t hard and crunchy like they should have been bars should have been, we
realized we didn’t add the right amount of condensed milk. When we were making
the condensed milk we had to use a certain amount of sugar and evaporated milk
to make it but, when it was done we didn’t measure out the amount that we
needed for the recipe which then made then more liquid then a bar. Another
cookie recipe we made was a peanut butter cookie. We used the creaming method,
we put the butter and the peanut butter in a mixing bowl. Then we added all of
the dry ingredients and mixed it. After everything was mixed we used an ice
cream scoop and baked them. As soon as they we pulled out of the oven we put
Hershey kisses on top.
- Jessica L.
Posted by ChroniclesCapersCanards
on
2:46 PM
To start with our yeast breads unit, we tested how long to takes for the yeast to rise. So, with our no knead bread, we made two batches - one that had yeast rise for 15 minutes and one that had it rise overnight. When we compared the two breads, I realized that the bread was less dense when it rose overnight. This was because the yeast had time to multiply which helped the bread rise.
The second yeast food that we made was pizza, where we also let the yeast rise overnight. That allowed the pizza to be fluffy and hold up all the ingredients.
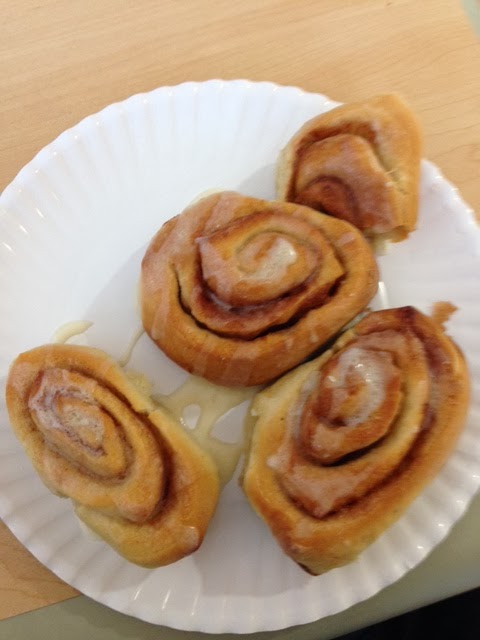
However, when we made the sweet dough, the yeast did not rise at all. We had to boil the milk and then put the yeast in the hot milk. We were supposed to make sure that the milk was not too hot to kill the yeast, but we didn't wait long enough and the yeast died in contact with the milk. So, our dough didn't rise at all and we had to use part of another group's dough to make or cinnamon rolls. Next time I make them I'll be sure to wait for the milk to be the right temperature for the yeast to react and rise.
~Maryyam A.


Posted by ChroniclesCapersCanards
on
4:15 PM
Nicholas Carozza
In this unit we studied and created yeast breads. All of these creations included some amount of yeast. Within this unit, we made rolls, grilled pizza, soft pretzels and cinnamon buns.
The highlight of this unit for me was the grilled pizza. This pizza did create some issues and did not come out to the quality that I had expected. In order to create our grilled pizza we had to first gather our mise en plase. We had to get our bowls, measuring cups and ingredients. Our ingredients consisted of yeast, warm water, flour, sugar, salt and oil. The process for this dough was fairly simple but if you don’t follow the directions precisely, you can mess up. First we had to bloom the yeast. To bloom the yeast we had to get lukewarm water and let the yeast sit in the water for a small period of time. While the yeast was blooming we combined all of our ingredients in the mixing bowl. Once the dough was formed we took it out and kneaded it on the table. We used the kneading method because we had to loosen out the dough and portion it out. Once the dough was portioned we rolled it out flat and put some olive oil on one side. We then went to the grill and grilled it on both sides. This is where a problem occurred because when we went to transfer the dough from the pan to the grill it fell apart basically. The form of the dough was terrible after that. Then after the grill we put some tomato sauce and cheese on the dough and put it in the oven. Once the cheese had dissolved it was ready to come out. The final outcome was alright, it wasn’t a pretty pizza but at least it was good enough to be edible.
Posted by ChroniclesCapersCanards
on
9:49 PM
In this unit we studied and created various types of yeast breads. Everything we made contained the leavening agent of yeast. Throughout the unit, some of the recipes we made included rolls, grilled pizza, soft pretzels, and cinnamon buns. One skill we had to master during this unit was the blooming method. This is when you put the yeast in warm water and let it bloom before adding it to the dough. The difficult part about the blooming method is making sure the water is the correct temperature. If the water is too cold, the yeast won't bloom, and if the water's too hot, it will kill the yeast. The yeast bread we made this unit that gave our group the most difficulty was the pizza. This posed to be the most challenging because it had so many steps that needed to be done. The first day we had to create the dough. We then had to let it sit overnight, in order for it to rise. The next day we had to roll out the dough, divide it amongst our members, grill it, put on the toppings, and then finally put it in the oven to bake. Something our group learned this unit was that we always need to have our mise en place. This is important because it cuts down the time needed to find tools later, and it also makes it easier because you have everything you need right at the beginning.
-Veronica E.
Posted by ChroniclesCapersCanards
on
9:06 PM
For the yeast unit we made flatbread pizza, pretzels, monkey bread, and regular bread twice. The reason why we made bread twice was so that we could learn to tell if there was a difference if you left the dough over night vs. cooking it right away. The dough that was left over night was much better because the yeast had time to sit. In this unit we also learned that we have to be careful with yeast, because it is a living organism, so when you put it in warm water to bloom, you have to make sure not to kill the yeast. If you kill the yeast the dough will not rise properly. In our monkey bread recipe, we used too much yeast, and had to end up almost tripling the recipe in order to make up for it.
CW
Posted by ChroniclesCapersCanards
on
8:01 PM
In the yeast unit we made food such as bread rolls, grilled pizza, pretzels, and Mexican chocolate loafs. We found this unit somewhat difficult because it required us to make sure that we didn’t kill the yeast that we used. If the yeast was to die then our dough would not rise and we would not get the product that we wanted. We ran into some trouble when making the pretzels. When placing the larger ones into the water to fry them they began to almost fall apart making it more difficult for the skimmer to take them out. Also, when making the grilled pizza, the cheese wasn’t quite as melted as it should have been so that made a difference to the final product. Overall, I enjoyed this unit. I learned a lot of new techniques that I will be sure to use in my own kitchen.
Laken H
Posted by ChroniclesCapersCanards
on
9:37 AM
We made pretzels! First we made the dough by mixing the yeast with warm water to activate it. Then we added all of our other ingredients in and started to shape them into pretzels. My group made more pretzel nuggets than anything, but we did make our own actual pretzels. Then we put them in a mixture of baking soda and water on a boil, so we can get that golden brown color. After we put salt on them, we popped them in the oven and cleaned up, waiting for our lovely pretzels. Once they came out, we all got our own and split the pretzel nuggets up and started eating them. They were so good!! Sarah H.
Posted by ChroniclesCapersCanards
on
9:35 AM
For the yeast bread unit, we made no knead bread, cappuccino knots, grilled pizza, and soft pretzels.
The first bread was baked right away without letting the yeast rise. This bread barely tasted yeasty, and ours was undercooked.
The second bread we made contained yeast that had risen for two days. This bread had a much stronger flavor, and we kept it in the oven for longer so that the inside was warm and the outside was a crunchy golden brown.
Our grilled pizza also contained yeast that was given a few days to rise. We used too much oil and that made it hard to flip them on the grill, but the overall flavor was good.
Our soft pretzels were made by rolling the dough into knots and nibs and frying them in a mixture of hot water and baking powder. We used a skimmer in order to fish the pretzels out after they fried.
Our cappuccino roll took two days to make. For the first day we made the sweet dough, allowing the yeast to bloom in milk and water.After growing for a day, we cut the dough into rope, rolled it in instant espresso and sugar, baked them, and put a glaze on top. Even though we didn't constantly knead the dough while we made it, the texture was still light and fluffy.
Lilly F
Posted by ChroniclesCapersCanards
on
9:32 AM
This week in baking and pastry, we made different types of yeast bread. First, we made classic yeast bread by mixing in the yeast with warm water, then adding the dry ingredients and rolling the dough into rolls. The second time we made these we let the yeast rise over night and te bread came out much more fluffier and had better taste.
Next, we created similar dough and let the yeast rise overnight. The next day, we grilled the dough, added sauce and cheese, and put it in the over to make a flatbread.
The last thing we made in the unit was cinnamon rolls. We created a basic sweet dough and budded the yeast in hot water and letting the dough sit overnight. However, we must have killed the yeast because our dough didn't rise, so we had to use another groups extra dough. We then added butter and cinnamon sugar to the dough, and rolled the dough into a spiral shape. We cut the dough into pieces and cooked in the oven. Despite the problems, the cinnamon rolls were delicious and the best thing we made in the yeast unit because they had the most flavor.
-Emily C
Posted by ChroniclesCapersCanards
on
6:44 PM
First we made rolls. We mixed all of the dry ingredients in a bowl, we then added the wet ingredients. When we measure the water we had to make sure that it wasn’t too hot because it would kill the yeast. The proper way to make bread is to let it sit for a day, to allow the yeast to rise. When we came back the next day we took the risen dough out of the bowl and then laid it down on a floured surface. We then took a bench scrapper and cut the dough into quarters. To roll out the dough we cupped the dough in between our palms and moved in a circular motion. Finally the dough was ready to go into the oven. To test if the bread was done we looked for a golden brown color as well as the bottom sounding hollow when you tapped it.
Next, we made cinnamon rolls. We grabbed a bowl and added all of the dry ingredients in it. Then we melted butter. Next milk and water was brought to a slight boil, we didn’t want it too hot because we would be adding yeast to it. In our group our yeast didn’t look right when it was added to the wet ingredients so we started over. We decided this time to use a thermometer. The thermometer that we used was invalid because when you looked at the temperature it was reading the room temperature but it wasn't accurate. Also, on the thermometer there is a little tick mark which needed be submerged in the liquid in order to get an accurate reading. We made these mistakes and the milk and water was about 20 degrees hotter than we had thought it was originally.
Jessica L.


Posted by ChroniclesCapersCanards
on
8:48 PM
In the quick bread unit we made pancakes, crepes, pumpkin muffins, cinnamon muffins, chocolate chip scones, and biscuits. In our first recipe my table baked, which was the pancakes, we ran into a problem. The problem was that we realized our batter was not the right consistency, it had turned out like dough. Luckily it was a simple problem to fix, we just had to add more milk, but it was a learning process. Also when we made pancakes, we learned when the right time to flip them is- which is when little bubbles begin to appear on the surface of the pancake. All of our baking that used the muffin method went pretty smoothly, which was the pumpkin and cinnamon muffins and the crepes. We also learned the biscuit method. Using that method we baked biscuits and scones. The biscuit method is different from the muffin method because instead of melting the butter and mixing all of the ingredients together, we cut up the butter using the pastry cutter so that before we added the liquid our batter looked like a coarse meal. Clara W.
Posted by ChroniclesCapersCanards
on
7:33 PM
It is interesting how the same ingredients, mixed in different amounts can make such a range of flavor and style. Pancakes are fluffy, crepes are thin and smooth, and muffins are rich and puffy. In the quick bread unit we learned how to make a variety of flavors using the same general ingredients, however using different methods. We used the “biscuit-method” and the “creaming-method”. We began with what seemed the most simple but turned out to be very tricky: pancakes. After making the batter we poured about a quarter of a cup onto the pan and waited to see the bubbles in order to know that they were ready to flip. It seems like an easy process however, the flipping required quick hands and the perfect amount of Pam, and thickness of the batter. This was a difficult task for my group to do.
The next quick bread we made was crepes. This was an easier task made with similar ingredients. This batter was very thin and soupy. In order to make these, we had to pour the batter onto the pan and spread it out. As the crepe is about ready to flip you will be able to see it dry from the outer rim to the center. Once the crepe is almost dry in the center you can flip it over and leave it on the stove for a minute or two then take it off and add a garnish such as melted chocolate, powdered sugar, etc.
Another quick bread we made was biscuits; in order to make this batter we used the “biscuit-method” by cutting the butter into the dry ingredients. By doing this we created the light and airy feeling of biscuits because the butter melted and created little holes in the dough to make the thin layers of the biscuits. The biscuits turned out deliciously buttery.
The final quick bread we made was muffins. To make this dough, we used the “creaming-method”. This created the thick batter that rose in the oven. The muffins were the easiest to make because they had a simple batter, and all that needed to be done was put them in a greased muffin pan. The final product of the muffin recipe was very tasty.
Some difficulties we had to overcome was mise en place, and following directions. Often times we had to stop what we were doing in order to get more materials to make/cook our recipe. Another difficulty we faced was following specific directions. For example: in our second muffin recipe we needed to mix the oil with the sugar first and then add the dry ingredients, however we mixed the sugar with the dry ingredients. Gratefully, the muffins turned out great and the batter ended out fine. The quick breads unit was a very savory unit!
-Meg M.
Posted by ChroniclesCapersCanards
on
6:34 PM
Our Baking and Pastry class just concluded our Quick Bread unit where we worked to create pancakes, crepes, muffins, biscuits, and scones.
During the process of making pancakes, crepes, and muffins, we learned how to use the muffin method, where all the dry ingredients are mixed together in one bowl and all the wet ingredients are mixed in another. Then, the two are combined using the creaming method in order to form a batter. In class, we used an electronic Kitchen Aid mixer in order to mix our ingredients all together.
While we made buttermilk pancakes, we learned the right consistency the batter should be (not too thick, not too thin). We also learned how to recognize that the pancakes were ready to be flipped by looking for the bubbles on face-up side, then how to flip the pancakes once they were ready.
While we made crepes, learned how to distribute the crepe batter evenly in the pan we were using: you must hold the handle and swirl the batter inside so that it forms a circle inside of the small pan. You know a crepe is ready to be flipped when the face-up side looks “dry”.
Finally, we learned the biscuit method while we worked to make biscuits and scones. This method involved first combining all dry ingredients using a whisk, then cutting the fat (butter) into the dry ingredients using a pastry cutter, a fork, hands, or another tool, until the mixture resembles coarse cornmeal. Then, the liquid was added to the dry mixture and everything was stirred until it formed moist dough. This dough was then used to form our biscuits (we used a cookie cutter to create equal portions) and scones (we used a scooper to create equal portions).
I thoroughly enjoyed this unit. I learned many useful things including different methods of mixing. I love muffins, so I am planning on using the new skills I have learned to make some muffins for my family in my own kitchen! Marissa T.
Posted by ChroniclesCapersCanards
on
2:43 PM
Nicholas Carozza
Baking and Pastry
Coming into this year I knew that baking and pastry would be filled with a lot of good food and a lot of fun. Throughout the unit, we baked pancakes, crapes, scones, bread, and muffins. All of which were very good. The ones that stood out the most were scones and muffins. They were all very good and had their own different processes. To make the scones, we added all of our ingredients into a large mixing bowl and we combined all of the ingredients slowly. Then as the batter got looser we added in a cup of chocolate chips. Then we used a cookie cutter to portion out the scone batter on a half sheet pan. We then put that into the oven for 10-15 minutes and when they came out, this is what our finished product looked like.
Posted by ChroniclesCapersCanards
on
2:42 PM
Coming into this year I knew that baking and pastry would be filled with a lot of good food and a lot of fun. Throughout the unit, we baked pancakes, crapes, scones, bread, and muffins. All of which were very good. The ones that stood out the most were scones and muffins. They were all very good and had their own different processes. To make the scones, we added all of our ingredients into a large mixing bowl and we combined all of the ingredients slowly. Then as the batter got looser we added in a cup of chocolate chips. Then we used a cookie cutter to portion out the scone batter on a half sheet pan. We then put that into the oven for 10-15 minutes and when they came out they were perfect. Our muffins came out very well, but the process for making them was a painstaking process. We started out by adding all of our dry ingredients into a mixing bowl, then we added all of our wet ingredients into the mixing bowl. While we mixed out ingredients we made our cream cheese filling and our cinnamon sugar topping. Once the ingredients were mixed and our ingredients we got a muffin pan the was filled with tons of little muffin spots. We added a small portion of the pumpkin batter to the muffin tin, then we added a small dab of creamcheese filling and to top it off, we spread some cinnamon sugar topping on top. Once those were out of the oven they were amazing. The process was difficult and annoying but our group came out with a great product. I would add pictures but they are not uploading.
-Nick Carozza
Posted by ChroniclesCapersCanards
on
5:37 AM
To reflect upon our first unit in Baking and Pastry, I now look back to how much we have done in such a short amount of time. My group made six different quickbread recipes: pancakes, crepes, grandma’s muffins, pumpkin muffins, biscuits, and scones. I learned so much during this unit including the biscuit method, which is cutting the butter into the dry ingredients of biscuits or scones, and the creaming method, which is to cream the butter and sugar together before mixing other ingredients. The thing that I want to work on in the next unit it mis en place. We never had all my ingredients and tools in our work area and that made us waste a lot of time waiting and looking for ingredients or tools. I was constantly going back into the kitchen to get tools like measuring cups, levelers, and scoops. If we did do mis en place, we would have easily cut down five minutes of the time we spent looking for items. Hopefully in the next unit, my group will accurately use mis en place to get our baking done faster so we can have our food by the end of the period.
~Maryyam A
Posted by ChroniclesCapersCanards
on
11:24 PM
In this unit we studied and made various types of quick breads. We started with buttermilk pancakes, then moved on to crepes, then muffins, buttermilk biscuits, and finally scones. All of the creations turned out pretty well, but getting there for some of them was a little bit difficult. The two recipes that posed to be the most difficult were the muffins and the biscuits. For our muffins, we chose to do a pumpkin spice muffin with a cream cheese filling, and a streusel topping. The hardest part about this was creating three separate mixtures (batter, filling, and topping) in the amount of time that we had. We really had to manage our time carefully in order to finish them. For the biscuits, we had to use a new technique, which was cutting in the butter. We used a fork to cut the butter into small enough pieces so that the dough had the correct consistency. Something that our group learned overall in this unit, is that we need to use the correct sized bowls for our mixtures so that they don’t overflow and spill out.
-Veronica E.
Posted by ChroniclesCapersCanards
on
8:57 PM
In this unit in baking and pastry we learned how to make a bunch of different things such as buttermilk pancakes, crepes, muffins, buttermilk biscuits and scones. There are different techniques that we learned to help us make a better product. Like for making pancakes, we learned that when the pancake has bubbles in it and the bubbles stay open, that’s when it’s time to flip them. For crepes, once you pour the batter into the pan you have to move the pan around so the batter becomes more spread out creating a thinner crepe. When making the muffins, you use a method called the creaming method. This method is when in a mixer you cream together your butter and sugar until smooth. Once that is complete you add in your eggs one at a time and then add your dry ingredients. When making biscuits and scones we used a method called the biscuit method. This is when you combine all of your dry ingredients and you chop up the butter into about ¼ of an inch pieces and place them in your mixing bowl with all of your other ingredients. You could either take a pastry cutter and cut all of the butter into your dry ingredients until they’re all incorporated. Or take a fork to combine the butter into your dry ingredients. Or what my team found the easiest was to just turn on your electric mixer which will do all of the work for you.
Laken H
Posted by ChroniclesCapersCanards
on
6:47 PM
This week we made quick breads and the ones that came out the best were the ones with the most flavor.
We started the unit by making pancakes and crepes. We made these by whisking the dry ingredients in a small bowl and whisking the wet ingredients in a larger bowl. Then, we combined the dry to the wet, added melted butter, and stirred until it was a consistent batter. Although different ingredients, both the pancakes and crepes were made in a saute pan and both flipped once until evenly cooked. Both came out fairly well, but the crepes tasted better since we topped them off with a melted chocolate sauce. The pancakes were cooked evenly, but lacked flavor.
The next week we made muffins, biscuits and scones. We made the muffins by using the creaming method. First we creamed the butter in a kitchen aid mixer and then added the sugar, followed by the rest of the wet ingredients. Next the dry ingredients were added to the mixture about one cup at a time and mixed until a constistent batter. Then the batter was added to the muffin tins and topped with cinnamon sugar. The next day we used the same method but made pumpkin muffins. The recipe seemed normal, but the pumpkin flavor wasn't very strong and there was also no sweetness so we had to top them with powdered sugar.
The biscuits and scones were made with the biscuit method. This method starts with mixing and dry ingredients and then adding small pieces of butter. The butter is then smashed with a fork and knife until there are no large lumps and then the wet ingredients are added. Both had a similar texture, except different flavors because we added chocolate chips to the scones and the biscuits were glazed with melted butter.
Emily, C

Posted by ChroniclesCapersCanards
on
5:10 PM
Today we made buttermilk pancakes! We put all of the dry ingredients into a mixing bowl, using a metal whisk to mix them together. Then, we got another mixing bowl and mixed together our eggs and buttermilk together and then added it to our other mixture by making a well in the middle of the dry to add the wet in. Taking a sauce pan, we put butter in the pan to melt so we can add it to our pancake batter to make it smoother (or at least make it smooth enough to pour into our pan to bake them!) Once I started to make mine, they came out looking like an overly fluffy crepe, so I took a picture of the recipe and decided to try them again at home, and this is how they came out! It was so much fun to see them look like actual pancakes this time!
Sarah H.
Posted by ChroniclesCapersCanards
on
1:57 PM
We made buttermilk biscuits. When making them we used the
biscuit method. We combined all the dry ingredients to one bowl. While that was
being mixed we cut the butter into ¼ inch square. Then, the butter is blended
in, making sure there are no big chunks of butter left. Finally, the wet
ingredients are added to the dry and the dough is done.
Another thing that we
made was scones. First we added all the dry ingredients into a bowl, and mix it
together. Then we took the ¼ inch pieces of butter and added it to the bowl. We
used a pastry cutter and cut up all the butter. When all the butter was cut up
into small chunks the wet ingredients were added, and combined together to make
the dough.
In addition, we also made muffins. During this lab we used
the creaming method. The butter and sugar were added to the bowl and mixed
until they were soft, then the wet ingredients were added. When those were
mixed we added the dry. When we added the dry we added it in about 1 cup at a
time.
Jessica Longi


Posted by ChroniclesCapersCanards
on
9:19 PM
After finally getting to
participate in our very own cupcake wars, I learned that I really love
decorating the cupcakes! I have always watched the TV show Cupcake Wars and
been intrigued by it. Actually being able to participate in such a competition
was a great experience. I have always found the flavors and taste interesting
but the presentation of the cupcakes even more fascinating. I’ll admit that I
do judge books by their covers at times, and food is no different. After this
competition I realized how much food is impacted by how it looks. It’s not
enough to just have good tasting food; part of what I love about going out to
eat is the presentation. The food always looks so good that I don’t even want
to eat it!
Through the cupcake war process, I
learned different ways to decorate and enhance the presentation of the cupcakes.
One of our cupcakes was a snickers cupcake and while I liked the taste, my
favorite cupcake of ours was the pinna colada one. This was our first cupcake
and had the best presentation of all of our three. We put the cupcake in a
margarita class and actually won second place for the presentation! From this
whole process I learned how fun it is to be creative with what you eat and
enhance not only the inside, but the outside as well.
Ridhi S.
Posted by ChroniclesCapersCanards
on
9:02 PM
Meat:
The nastiest food
you could ever eat is meat
your food had a face...
Veggie Burgers:
Slightly toasted bun
Patty cascaded with cheese
I can't wait to bite.
Pizza:
Crunchy and thick crust
Cheese melts inside of my mouth
That's the perfect pie.
French Fries:
Full of grease and fat
Although they are so yummy
I think I will pass.
Apples:
Green, yellow and red+
Juices pour out of each bite
Apples are the best.
Junk Food:
You're my favorite
kind of food to snack upon
I can't eat too much
Vegetables:
The healthiest kind
Also the most delicious
vegetables, yum!
-Emma
Posted by ChroniclesCapersCanards
on
11:11 PM
My favorite dessert is probably flourless chocolate cake. There are so many things about it that I enjoy. This type of cake is so rich and delicious. That also means that you only have to eat a little bit of it to feel satisfied. As a girl, I’m always watching what I eat, so this dessert is perfect. I only have to eat a little bit of it, but I’m just as happy. A really good flourless chocolate cake is sweet and when you put the bite into your mouth, it begins to melt a little bit. It is so smooth and soft, making it the perfect texture for a dessert. Another great thing about flourless chocolate cake is that it doesn’t have any flour (obviously). My sister has celiac disease, so her and my parents are always making sure that foods don’t have gluten. This is the perfect dessert for our whole family because my sister can eat it, no problem, and enjoys it, too. I love when there are fresh strawberries or a little bit of strawberry sauce drizzled on the plate around the cake. Sometimes, the cake can be a little too rich, so the strawberry is very refreshing with the heavy chocolate dessert. Also, chocolate and strawberry go very well together, in my opinion. Generally, I’ve seen this kind of cake always in a circle. It’s like your own personal sized cake, which I love about it. It makes me feel important and welcomed as a guest at a restaurant when it seems like a dessert has been prepared just for me. That may not be the case, exactly, but the personal cake makes it feel that way. This cake is delectable, delicious, and has so many amazing qualities. I encourage everyone to try it, if you haven’t yet. Cari W.
Posted by ChroniclesCapersCanards
on
9:49 PM
Every day should be Mother's Day if this is the kind of meal we can expect our kids to create!!!
Prepare to be dazzled.
I wonder who set the table?
Good stuff, Connor.
Posted by ChroniclesCapersCanards
on
10:53 AM
The Timeless Breakfast of Champions
Most mornings, my breakfast consists of a piece of toast that I grab and run out the door with on the way to school. However, Sundays are the one day of the week that I actually eat a proper breakfast. I always wake up on Sunday morning looking forward to a large breakfast. My favorite breakfast food would definitely have to be pancakes. This simple and easy dessert doesn’t take a lot of time, but it can be garnished in so many ways. What I usually go with is peanut butter! This mixes really well with the loads of chocolate chips I always add in my pancakes. This breakfast is sweet but not overpowering and I’m always in the mood for pancakes. My mom’s classic pancakes are actually made from a mix….but they’re still my favorite. I’m not sure what she does, but hers are always thicker and fluffy. Over Spring Break I went to visit my sister and we went to IHOP for breakfast. I went with the classic short stack of pancakes, but even those weren’t as good as my mom’s. Maybe it’s because I’ve grown up eating my mom’s pancakes, but those will always be my favorite!
-Ridhi Sahani
Posted by ChroniclesCapersCanards
on
10:57 PM
Over the weekend my mom and I decided to make apple pie for my family. We looked up the recipe on line, got all of out ingredients together and then we began to cook. My mom mixed most of the ingredient together while I made the pie crust. After we were done we poured the ingredients into the pie crust and put it in the oven for about an hour. My whole family really loved the pie and I can't wait to make it again! Emily R.
Posted by ChroniclesCapersCanards
on
10:02 PM
Over the weekend, I decided to make the pop tarts we made in class. I found a recipe and with the amount of people that wanted some I needed to double each ingredient. We made the dough and instead of putting nutella or peanut butter in it I just put cinnamon and sugar to make it more realistic to a cinnamon pop tart and everyone really seemed to like it. -Mikayla
Posted by ChroniclesCapersCanards
on
9:46 PM
Over break I was in Boston and we wanted to grab a bite to eat. We went to a pizza place and ordered our pre-made pizzas. When one pizza was ordered they said they didn't have any of that topping pre-made but it would only take five minutes. I thought this was odd because I know it takes more then five minutes for pizza dough to bake. But when it came out it was a grilled pizza dough. The first thing I thought of when we got our pizza was that we made grilled pizzas in baking and pastry. It actually much more efficient having the pizza dough grilled because it took less then five minutes to make. Amy M
Posted by ChroniclesCapersCanards
on
9:32 PM
My favorite snack to have after school is a smoothie. What I like most about smoothies are that they are so refreshing and sweet- and you can always change what type of smoothie you have depending on what type of fruits you put into it. I usually make my smoothies with yogurt that is usually flavored mango or peach, and then I use orange peach mango juice which adds nice flavor to the smoothie. Then, I add frozen or fresh fruit, depending on what I have at my house. Usually I put in frozen strawberries, blueberries, and raspberries. Smoothies have so few ingredients, they are so easy to make, and they are really healthy too! My favorite smoothie of all time would have to be Carribbean Passion smoothie from Jamba Juice. It has peaches, strawberries, ice, and a passionfruit-mango juice. It has the best flavor- it is tangy and has a tropical taste. None of the smoothies I make can compete with that one! -Caroline C.
Posted by ChroniclesCapersCanards
on
9:26 PM
Throughout the years of my existence, donuts have been something I have always enjoyed. From my child hood to now I always adore going to Dunkin Donuts and getting the classic Boston creme donut. Oh it is so delicious. One story of mine was a time when I was about the age of 7 or 8, I can’t remember. After a soccer game I played in and scored a goal, my dad decided to celebrate by getting me a donut. Since most of the time I don’t get donuts due to my mom wanting us to eat healthy, this was a treat. So after driving down to our own local DD, and going inside, we are surprised to find out they were out of donuts. That was the biggest disappoint ever. My dad and I weren’t about to give up et though. We knew there was a place called the Donut Hut so we decided to try it out. We got there and went inside to get my Boston crème donut when the owner said they were out as well. I was so angry at this point! All we wanted was a donut and we couldn’t get one. Eventually we went to another DD to get one but to this day we will never be more astonished to see donut stores run out of donuts. That is why I am very excited to learn how to make donuts in class so if my family and I run into this problem again, I can just make the donuts myself. -Ryan K. Class 2
Posted by ChroniclesCapersCanards
on
8:29 PM
The other day, I got lunch at school from the culinary paladar. My friend ordered the chicken sandwich and I got the Asian sliders. We each had half of the sandwich and one of the sliders. The chicken tender sandwich reminded me a lot of a flagpole sandwich that I can get from Misty Vale or the General Store. The chicken was almost the same, but the thing that really stood out to me was the bread that the sandwich was on. It was a rosemary focaccia, as opposed to the poppy seed roll that I would get at one of the local delis. I thought the rosemary added a very nice complimentary flavor to the sandwich, and I also enjoyed the flatter focaccia style. As much as I liked the chicken sandwich, I think I liked the Asian sliders a little bit more. The meat was cooked to perfection and the wasabi mayo was amazing. I didn’t really know what to expect when I saw that on the menu, but I decided to try it anyway. I always thought of wasabi as a very spicy food, but when it was paired with the mayo and candied bacon, it just left a nice sweet tang in my mouth. I don’t think I’ve had anything quite like that slider before and I really enjoyed it. I can’t wait until the next paladar so I can try out some more new and delicious foods at school.
Jake Lambert
Posted by ChroniclesCapersCanards
on
12:32 PM
Ever since I can remember, I have always hated
cheese. I could never eat it without being disgusted by the taste. No matter
what kind, cheddar, American, swiss, gouda, Monterey Jack, blue cheese, goat
cheese, I hated it. I wouldn’t eat plain slices of cheese, pizza, macaroni and
cheese, cheeseburgers, cheese sticks, lasagna; no matter what kind of food it
was, if it had cheese in it, I refused to eat it. It was kind of funny because while
I simply hated cheese, my brother loved it. He could never get enough of it and
would eat it all the time, even to the point where my parents had to force him
to stop eating it. It disgusted me when he would eat cheese in front of me. I
never understood how something that tasted so awful to me could taste so good
to another person, let alone someone that I was related to. As I’ve grown
older, I’ve become more open to trying things. I will now eat cheeseburgers and
macaroni and cheese, although only certain kinds. I will occasionally eat a
slice of cheddar cheese but I still refuse to eat cheesecake and my mom will
still make me a separate, personal lasagna without the cheese filling for
dinner. Ashley H.
Posted by ChroniclesCapersCanards
on
8:03 AM
The Last Fancy Cake
Since I’ve told you about my dad, and his experience with baking. (he is better at cooking) I’ll tell you about cakes and my mom’s more interesting and refusal to make fancy cakes.
When I turned four, my mom made me a birthday cake in the shape of a castle. It had the walls made of cake, with blue icing. Sugar cones for the towers with candy’s as windows and decoration. It was a big success, but took forever I later learned a few years back before I was born.
For Easter, my mother made this giant Peter Rabbit cake. It had frosting grass and everything. After everyone ate it, she was pleased but only after did she make my castle cake before saying. “I’m never making fancy cakes again”
Personally I don’t mind, I like to bake, maybe I might try to make a fancy cake. I mean it’s always been fun to make a cake, but in my opinion making a cake that someone will enjoy is much better. That’s what I like to do, is to give someone a cake. Then watch them smile and eat the piece, I see even though that cake may have been the last fancy cake.
I mean, cake isn’t meant to be fancy it’s made to be enjoyed. Maybe someday I will make a few fancy cakes, but right now letting the last fancy cake lie, is what I’ll do. Right now, I’m fine with just cakes that are simple, and make people happy.
RS~class 2
Posted by ChroniclesCapersCanards
on
4:03 PM
I was in France over April break and the food in France is to die for! I never ate the same thing twice because there was so much variety. Even the packaged snacks are delicious (and a million times better than the ones here). Also, the main meal in France is lunch, not dinner, like how it is in America. Every family’s meal traditions varied, like here, but most families have a sit-down lunch all together (on the weekends) and then breakfast and dinner are much more casual. For breakfast most days I ate cereal, which was pretty similar to cereals here. It was called Chocopic, and it was small chocolate flakes-nothing special, but delicious nonetheless. My first day in France, our lunch was so large. There were chicken, mashed potatoes, pasta, rice and bread-lots and lots of bread. For the bread, there was this strange pork spread that came in a can, but it tasted good, so I ate it. For dinner, my host brother, some other kids, and I went to a small kebab restaurant. But, the odd thing was, they were sandwiches, not meat on skewers. The next day, lunch was even bigger than the first day. There were 3 different salads, sausage, steak, and more bread. Then we had French cheeses, and finally dessert. For dessert in France, though, they have yogurt. We do eat that here, but not usually as dessert. At school, lunches were also really big. No one brings lunch to school, and there isn’t any variety in the food they get to eat. There’s a main meal, like chicken and vegetables. Then, you can choose one side, like a salad or hard-boiled eggs. Then, there’s fruit and bread. Unfortunately, though, the food is still not very high quality and wasn’t very appetizing! I think I prefer bringing my own food!
Cari W.
Posted by ChroniclesCapersCanards
on
10:13 PM
Snickerdoodle cookies are really the best thing we made in baking and pastry. They were not too hard and tasted so good. This was the recipe my group followed and I have never eaten a better cookie:
Ingredients
1/2 cup salted butter, softened
1/2 cup vegetable shortening
1 1/2 cups plus 2 tablespoons sugar
2 medium eggs
2 3/4 cups all-purpose flour
2 teaspoons cream of tartar
1 teaspoon baking soda
1/4 teaspoon fine salt
2 teaspoons ground cinnamon
Directions
Preheat the oven to 400 degrees F.
In a large bowl, combine the butter, shortening, 1 1/2 cups sugar and the eggs and mix thoroughly with an electric mixer on medium speed until creamy and well combined, 1 to 2 minutes. Sift together the flour, cream of tartar, baking soda and salt, and stir into the shortening mixture.
In a small bowl, stir together the remaining 2 tablespoons sugar with the cinnamon.
Shape the dough into 1 1/2-inch balls (1 tablespoon per ball), and roll each ball in the cinnamon-sugar. Arrange the dough balls 2 inches apart on ungreased cookie sheets. Bake two sheets at a time until the edges of the cookies are set but the centers are still soft, 8 to 10 minutes, rotating the sheets halfway through. Transfer the cookies to wire racks for cooling. Repeat with the remaining dough balls. Store in an airtight container.
Even the dough was amazing. I would have have just eaten the whole bowl of cookie dough if I could. They came out of the oven warm, soft, and perfectly cooked and I want to make this recipe again and again. It was really easy too even a 1st grader could make them.
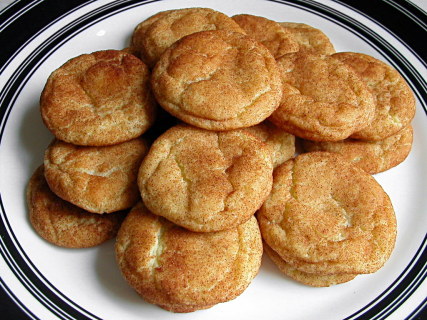
Even the picture makes me hungry just looking at it. They are cited in print from at least 1889 and were very popular in New England at this time. However, it has been said that Snickerdoodles originated from Germany with their name being interpreted from the German word Schneckennudeln, or cinnamon-dusted sweet rolls. Despite the confusion of their origin, Snickerdoodles are the best cookie and can be enjoyed by anyone and everyone. -Makenzie C
Posted by ChroniclesCapersCanards
on
9:57 PM
One of the most delicious things in the world is by far the french fries from McDonalds. You can't go to McDonalds and not order a fry...its impossible! Whether is be a small or large order of fries, you gotta have them. No meal is complete without McDonalds french fries. With all their glory comes a small fee to pay...the nutritional value of them. The ingredients are:
Potatoes, vegetable oil (canola oil, hydrogenated soybean oil, natural beef flavor [wheat and milk derivatives]*, citric acid [preservative]), dextrose, sodium acid pyrophosphate (maintain color), salt. Prepared in vegetable oil (Canola oil, corn oil, soybean oil, hydrogenated soybean oil with TBHQ and citric acid added to preserve freshness). Dimethylpolysiloxane added as an antifoaming agent.
CONTAINS: WHEAT AND MILK.
*(Natural beef flavor contains hydrolyzed wheat and hydrolyzed milk as starting ingredients).
Who knew that the fries weren't vegetarian!? That's pretty gross.(Good thing I haven't eaten there in a while!) There was a 10 million dollar lawsuit against McDonalds for this reason. Anyway the nutrional value of these scrumptious fries is very low. In an order of SMALL fries there are 230 calories! That's so many! You'd have to eat like 230 apples if you wanted to catch up with the calories in fries. There are 100 calories from fat and there is 160 mg of sodium. That's already past the recommneded amount of sodium per day with just small fries. A large fry contains 500 calories!!!!! That's way too many! So I recommned of you go to McDonalds please order a small fry for a side (if you REALLY have to get a side) and go for a looong jog afterward because McDonalds is so good but so bad for you! -Emma
Posted by ChroniclesCapersCanards
on
9:42 PM
Crepes:
One of my favorite things we did in baking and pastry this year was the crepes. They required such few ingredients and they tasted so good. Although not every one came out perfectly as soon as you put some nutella inside and sprinkled some powdered sugar on top they were really good.My mouth is watering just writing about them. You can pretty much have them for any meal depending on what you put inside. I would love to try a breakfast crepe with some strawberries or some fresh fruit inside.

Crepes orginated in France and if you go to France they can be sold on every street corner... like a hotdog in New York. For a dinner or lunch crepe they can be filled with ingredients such as ham, cheese, eggs, ratatouille, or mushrooms. For dessert/ breakfast they are usually filled with maple syrup, lemon juice, whipped cream, fruit spreads, custard, and sliced soft fruits or confiture. -Sam C.
Posted by ChroniclesCapersCanards
on
9:29 PM
PIE:
Simple and easy
but it always tastes so good
I love to make pie
Cookies:
Cookies are the best
You can not go wrong with them
They are so easy.
Pizza:
Cheesy and crunchy
makes a perfect pie to eat
No pepperoni
Crepes:
One of the best things
was the crepes we did make
they were just perfect
Pancakes:
Pour some batter on
the hot stove and watch them cook
they melt in your mouth.
Baking and Pastry:
It is the best class
We get to eat everything
nothing is better.
Candy:
It tastes really good
It is so bad for you though
It is bittersweet.
- Morgan C
Posted by ChroniclesCapersCanards
on
6:18 PM
What would you eat if you were told you had one last meal? What would you choose? Mine, easy. My plate would contain a little surf and turf (skirt steak and scallops) cooked on the grill, a sweet potato lightly buttered, some broccoli cooked in a pan on the stove with butter and a tossed salad with lots of chick peas in it. My mouth is watering as I write this. YUM. This meal is sweet, and salty. It can't let you down! For dessert I would have a big slice of warm peach pie topped with cookies and cream ice cream and a scoop of whipped cream. I would like to eat this meal outside under an umbrella. Honestly this sounds just so perfect! Someone cook for me, please?!!
With love and an empty stomach, MJ Rossi <3
Posted by ChroniclesCapersCanards
on
8:30 AM
THE CLASSIC BLT
My favorite summer food is a BLT
(Bacon, Lettuce, and Tomato) sandwich. This is an American classic.
This sandwich can be made with just 5 ingredients:
·
Bread (any kind at all)
·
Mayo (if you don’t like it you don’t need it)
·
Lettuce
·
Tomato
·
Bacon (lots of it)
Additionally I like to add some salt and
pepper
The BLT didn’t really
originate until 1903, when the recipe was in the Good Housekeeping Everyday Cook Book.
The BLT can now
be found at any local deli and most restaurants will offer some sort of BLT or
variation of the sandwich.
So if you are a bacon lover you will
definitely love this sandwich!
-Jenna F.


.JPG)


.JPG)


.JPG)


